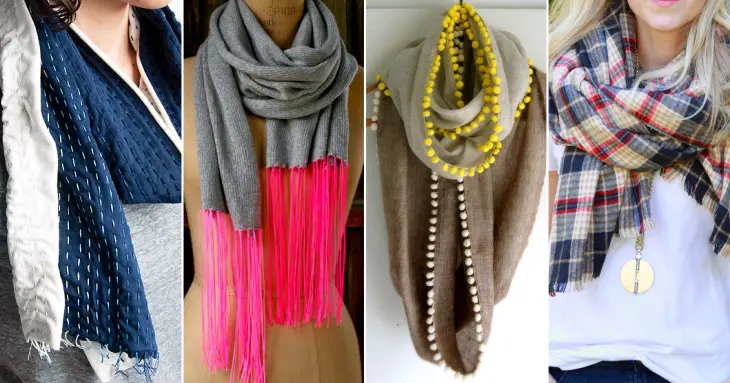
Fall is finally here and with the changing of the season comes the lowering of the temperature. From light, summery clothes, you have to wear long-sleeved shirts and maybe even layer it with a jacket, a scarf, or both. Now that you put away those summer clothes for storage and trading them for heavier frocks, you should also conduct an inventory of the scarves that you have.
A scarf is a piece of garment typically worn around the neck, and its main purpose is to keep your body warm, especially during the winter season.
Fortunately, you don’t have to spend a lot of money on designer scarves which are made from expensive fabrics. With a little ingenuity and some do-it-yourself skills, you can make your very own scarves to keep you warm for the coming fall and winter seasons.
10 Easy-to-Do, Stylish Scarves that Offer Warmth
A do-it-yourself scarf is perfect for wearing layered clothes during the colder months of the year. To save money without sacrificing style, here are the top ten DIY fashionable scarves to keep you warm this season:
1. DIY Infinity Scarf
via Babble
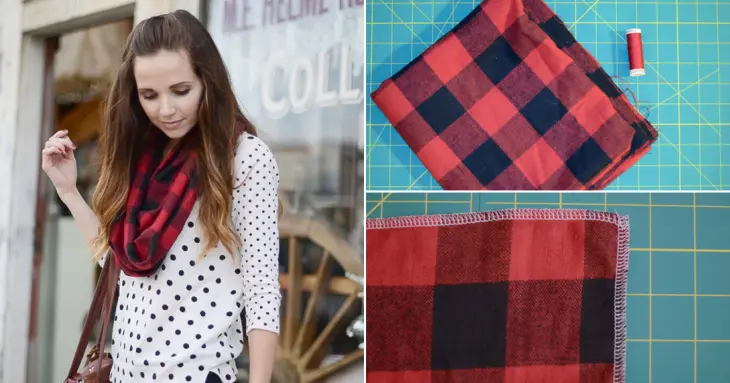
A traditional scarf is made from a long, rectangular strip of fabric. It can be worn tied around the neck in a variety of ways. However, there is one other type of scarf which does not require any tying skills: an infinity scarf. Instead of using a long strip of fabric, an infinity scarf is a closed loop of fabric which does not need any tying or knotting.
It’s a versatile piece of garment which is stylish and offers warmth during the cold season. It can be worn as a shawl, a mini-cape or as a traditional scarf which is loosely wrapped around the neck.
To make a DIY infinity scarf, all you need is one yard of fabric and a matching thread. Choose a thick, warm fabric like flannel, and go as crazy or as traditional with your color options.
Here are the steps on how to make the DIY infinity scarf:
- Spread the fabric on a flat surface. With a sewing machine, do a zigzag stitch around the perimeter of the fabric. This way, the flannel will not unravel or get frayed. You can also do a two-fold stitch on the fabric, although the sides will feel a bit thicker to the touch.
- With the long sides together, fold the scarf in half. Use a combining stitch along the non-folded edge to create a long tube of fabric.
- Turn the scarf with the right side out, and lay it flat against a table. Your goal is to combine the two long sides of the fabric together to create one piece of garment that resembles an infinity scarf.
- Press the seams, then fluff the scarf and it’s ready to be used.
2. Blanket Scarf
via Zevy Joy
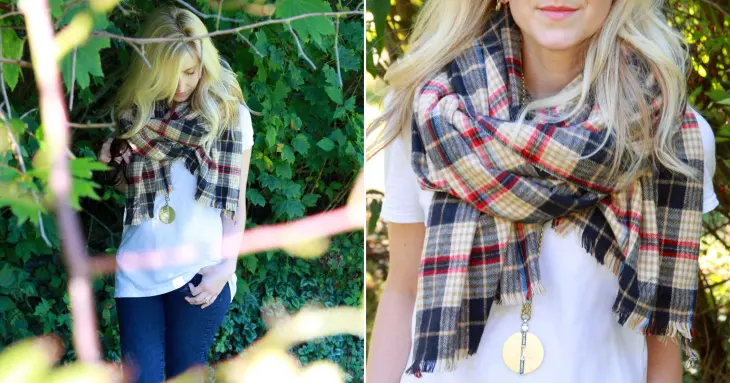
Using a couple of yards of cotton flannel and a stitch ripper, you can create a blanket scarf which has become popular over the past few fall seasons. If your fabric is 44 inches wide, you need to have it cut two yards long. To create the frayed edge, you can use the stitch ripper and rip the first few threads of the fabric which is from the short side. Continue ripping the thread across until you have about one or two inches of frayed fabric.
This is a very easy DIY scarf to make and depending on the pattern of the fabric that you will choose, it’s utterly fashionable, too.
3. No-Sew Scarf
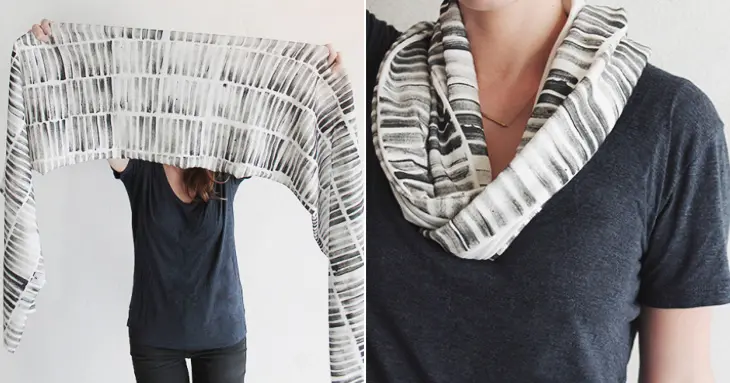
A jersey knit fabric makes for the perfect no-sew scarf. Why? Because when you use a pair of scissors to cut through the fabric, the material will not get frayed. So even without sewing, you can cut the fabric to look like a designer scarf.
If you want, you can also personalize the scarf by creating your own stamped fabric. Just buy a cheap stamp kit from an arts and crafts supply store. Use fabric paint, then stamp away on the jersey knit fabric.
Voila, you have your very own no-sew, personalized stamped scarf!
4. Pompom Scarf
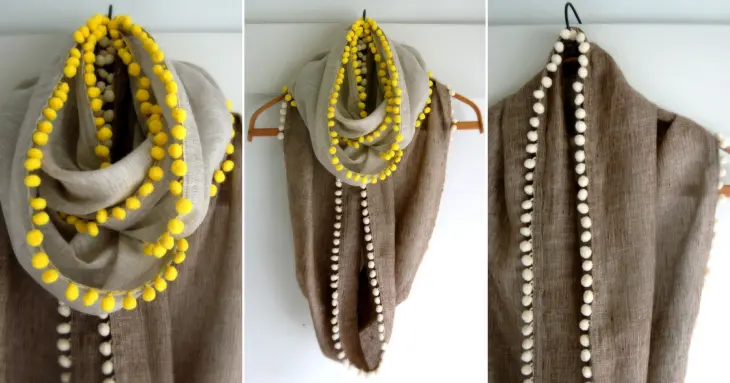
via PurlBee
If you want a light yet stylish scarf, use half a yard of linen fabric in your color of choice. You’d also need a cotton thread and four yards of medium pompom trim, which you can buy from a fabric store.
With the help of a sewing machine, you can create a two-fold stitch on all edges of the scarf, while also attaching the pompom trim. You can either join the two edges of the fabric together to make an infinity scarf, or simply make one strip of rectangular fabric to make a traditional scarf.
5. Knitted Scarf
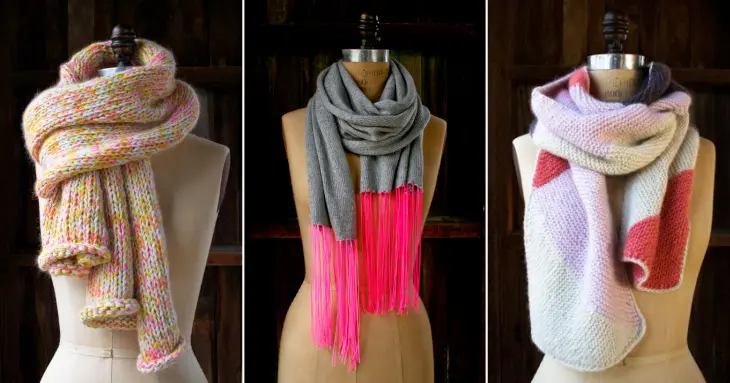
via PurlBee
At websites like PurlBee.com, you can get online tutorials on how to knit or crochet basic scarves. What’s good about creating a knitted scarf is that when you give it as a gift to someone else, there’s that personalized touch to the item because you painstakingly made it from scratch.
Purlbee.com offers actual knitting lessons but when you visit sites like YouTube.com, you can also get video tutorials on how to knit a basic scarf. For this, the only materials that you would need are balls of yarn and a pair of knitting needles. If you only have the basic purl stitch skills, that’s exactly what you can use to make a knitted scarf.
6. Quilted Scarf
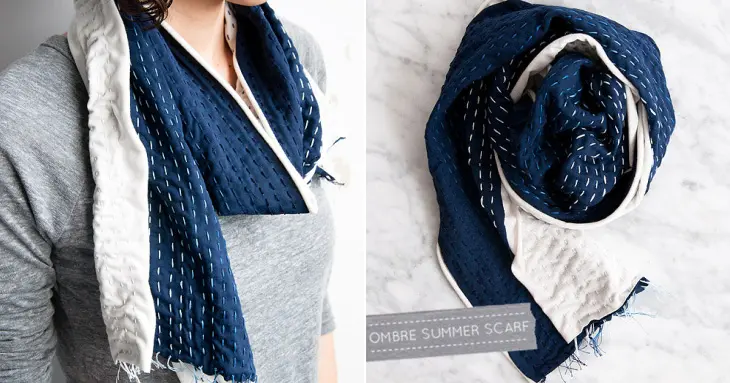
via Design Sponge
If you want a thick scarf that you will keep you warm all the way until winter, go for a DIY quilted scarf. For this, you would need one yard each of 60-inch width jersey cotton in different colors. With the help of a sewing machine, you can stitch the two fabrics together as you would a traditional quilt, only it is made on a smaller scale. The resulting scarf should be thick and warm enough to last you through the winter months.
7. Lace Scarf
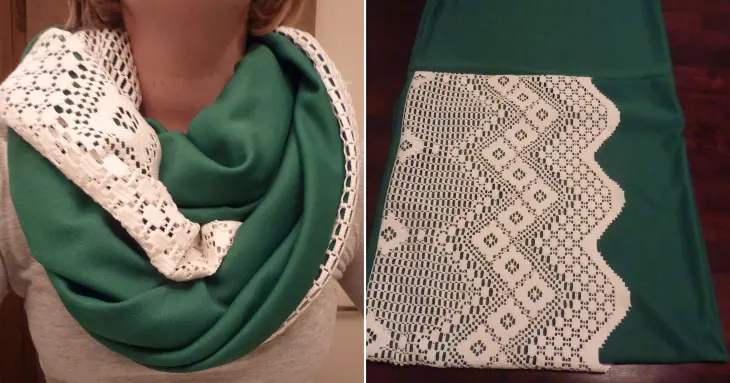
via Planting Sequoias
To save money for this DIY scarf project, you can buy a frilly lace curtain from a thrift shop in your area. You can combine the frilly lace fabric with a jersey knit fabric of a complimenting or an opposing color.
But since most frilly lace curtains are available in white, you can just as easily choose any color for the jersey knit fabric. Use a sewing machine to sandwich the lace inside equal lengths of the jersey fabric. Sew the edges together, and tie the ends up together to form a loop. Make sure that once turned on the right side, the lace part of the scarf will be visible.
8. Buttoned-Up Scarf
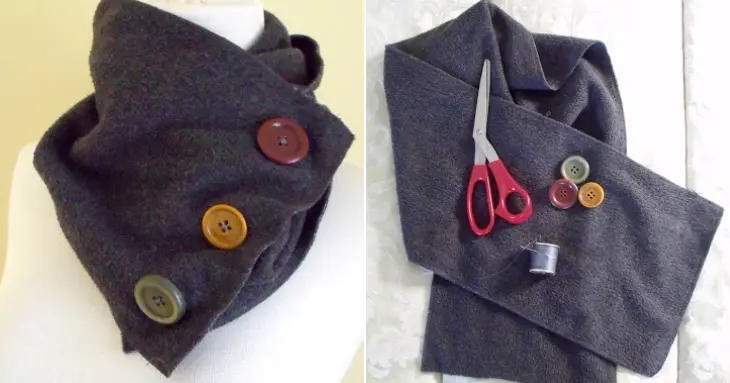
via Maria Torti
For a unique looking scarf, all you need is an existing scarf that you would like to restyle, or a strip of fabric with the edges either frayed or sewed.
Here’s how to do the buttoned-up scarf:
- Sew three buttons on one end of the scarf. Make sure that they are evenly spaced out.
- On the other side of the fabric, cut button holes and hand stitch them to avoid fraying or use the buttonhole setting on your sewing machine.
- Finally, wrap the scarf around your neck and button at the end. Even a simple white t-shirt would look sophisticated when worn with this buttoned-up scarf.
9. Long Scarf
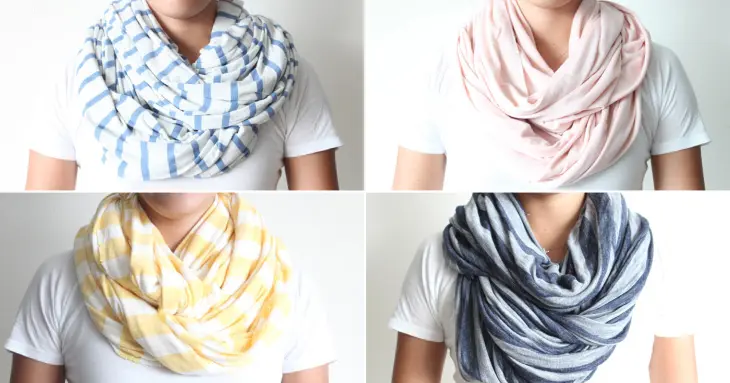
via Come on Ilene
For this, you simply need to have a longer strip of fabric – anywhere from 54” to 66” in width and one to two yards in length. Simply sew the edges and join two of the shorter ends of the fabric together. You can make a long infinity scarf which will keep your neck warm even all the way through the winter season.
10. T-Shirt Scarf
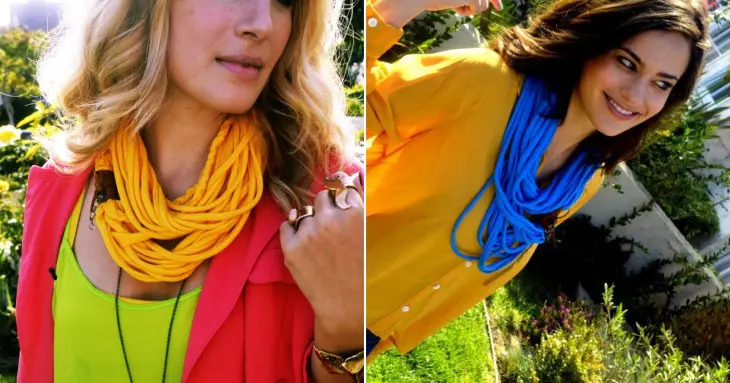
via Mr. Kate
To create a unique, stylish t-shirt scarf, you would need one t-shirt, a pair of scissors, hot glue gun and decorative elements. Here’s how you can make the scarf:
- Lay the t-shirt flat on the table. Cut from the left armpit to the right armpit, and dispose of the top part which is the one with sleeves. You should now have a tube-top looking piece of garment. You can also cut the bottom of the hem so that both the upper and lower parts will not have hems.
- Next, cut 0.75” to 1” strips from one looped end of the t-shirt to the other. The end result should be that you there is a part of the fabric – at least one inch – which is not cut at the top.
- After cutting all the strips, pull on each one to stretch and curl. The softer the fabric of the t-shirt, the better.
- By now, you should have a loop of fabric with individual pieces curled, looking exactly like an infinity scarf.
- You can use some hot glue to cover up the uncut section of the fabric. You can use a piece of ribbon, leather, spare pieces of beads or buttons – be creative in coming up with the design. Wear as you would a regular scarf.
Update your wardrobe at no cost with these DIY scarves that will keep you warm and make you look ultra-stylish throughout the fall season.

